In this tutorial, we are going to cover how to add swagger to ASP.NET Core 3.0 Web API. Swagger is an api testing tool and it is very easy to use swagger with ASP.NET Core 3.0 Web API. We can test our APIs using swagger. Swagger is an Unordered List of representation of RESTful API.
So, in this tutorial, first-of-all, we will see how to create web api using asp.net core 3.0, and then we will see how to add swagger to ASP.NET Core 3.0 Web API, and then we will cover how to show XML comments, and then we will see how to add different swagger documents for different versions of APIs.
How to create web api using asp.net core 3.0
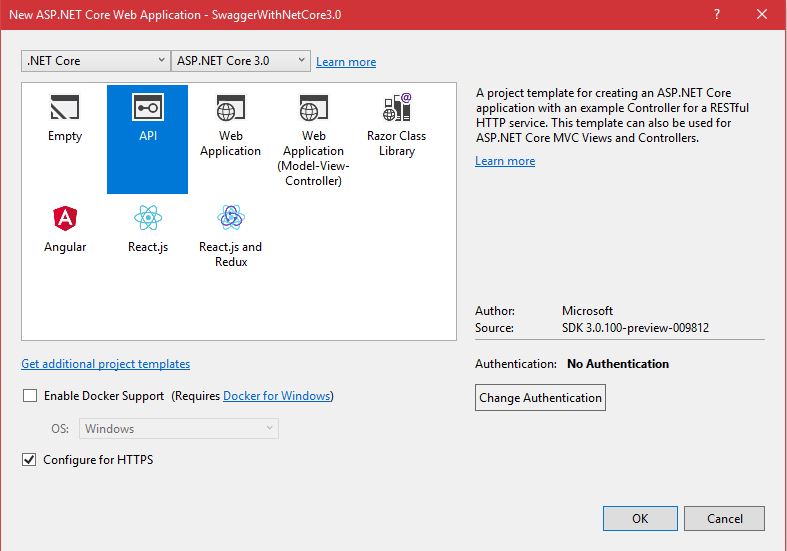
In this step, we will create a new ASP.NET Core 3.0 Web API using Visual Studio 2019 preview. So, open visual studio, then click on “Create a new project”, and then select “ASP.NET Core Web Application” and then click on “Next” button. Then enter the name of API, and then location of your project and then click on “Create” project. Then select asp.net core version from upper dropdown and then click on “API” template and then finally click on “OK” button.
Add packages for swagger
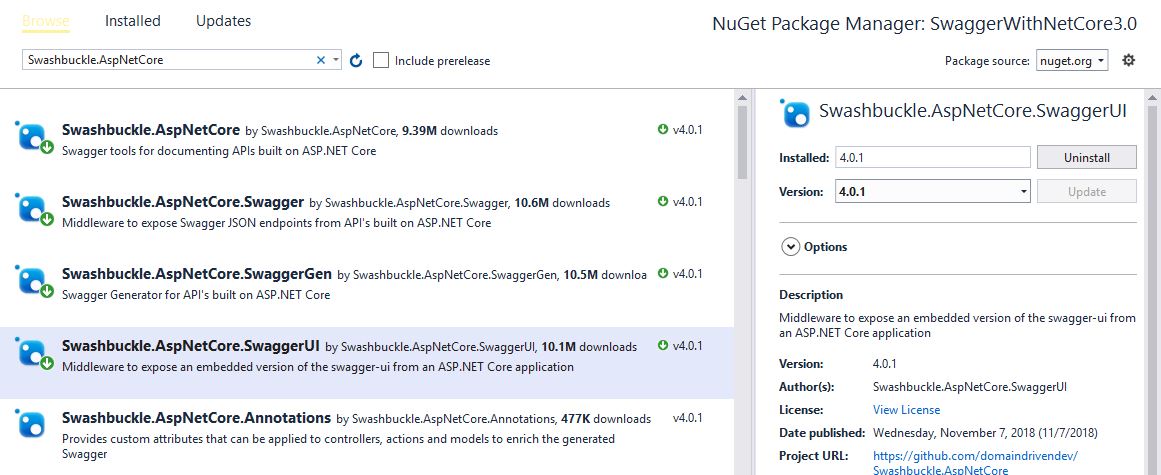
After creating the asp.net core 3.0 web API, now in this step we will add packages for swagger in asp.net core 3.0 web api project. So, open nuget packages and install NuGet packages as you see in the below screenshot.
Add swagger to ASP.NET Core 3.0 Web API
In this step, we will add swagger to ASP.NET Core 3.0 Web API. So, go to project folder structure and then open startup.cs and then add the middleware as you see in the below file code line # 5 to 24.
Now, enable the swagger UI in Configure() method.
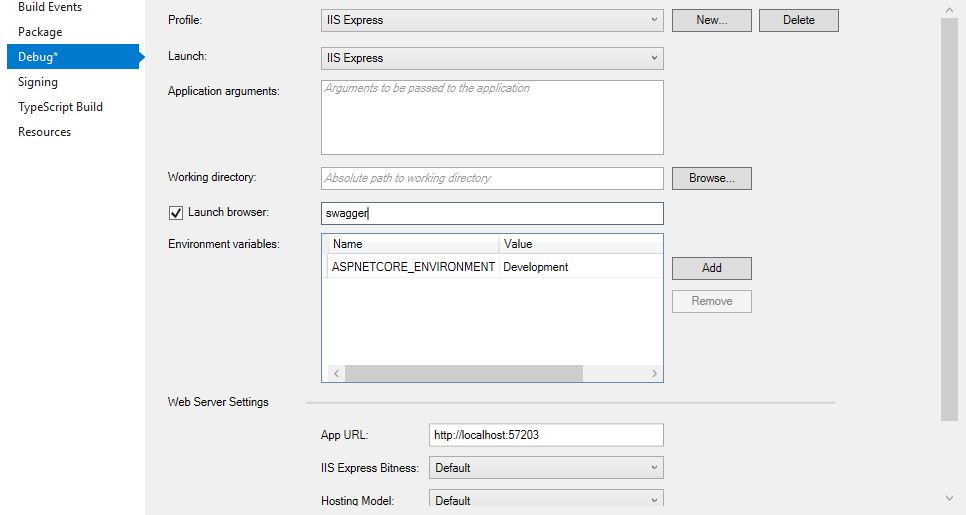
Now, change the default load URL. So, go to project folder structure and then right click on project => then select properties => and then go to “Debug” tab and then change the launch browser value as you see in the below screenshot.
This is all that you need to add swagger to asp.net core 3.0 web api. So, now run the project and you will see the output as you see in the below output screenshot.

How to show XML comments in swagger ui url
Now, in this section, we will add XML comments. By default, swagger doesn’t show XML comments. Let’s see how to add XML comments with swagger ui url.
So, go to project folder structure and then right click on the project and then select properties and then navigate to the build tab. And now check the “XML documentation file”’ as you see in the below screenshot. Using this option, XML comments are saved in an XML file with the name of your_assembly.xml.

Now, we need to add Swashbuckle’s IncludeXmlCommetns() method in startup.cs class. So, write this below code within the AddSwaggerGen middleware.
Now, add XML comments just above our method as you see in the below code.
Now, just run the project and you will see the output as you see in the below screenshot.

how to add different swagger documents for different versions of API
Now, in this section, we will see how to add different swagger documents for different versions of API. This will help us, if we have multiple versions of web API. So, add this below code within the AddSwaggerGen middleware in startup.cs class.
Now, add this below code within the Configure method.
Thank you for reading this post. Keep visiting and sharing this post!

Hi,
Thank you for excellent explanation. But after .Net core 3 release I have such errors when application trys to strat
Lifetime: Transient ImplementationType: Swashbuckle.AspNetCore.SwaggerGen.SchemaRegistryFactory’: Failed to compare two elements in the array.use it is an interface
D0 you have any idea to solve this?
It’s sufficient to install Swashbuckle.ASpNetCore, as it already includes Swagger, SwaggerGen and SwaggerUI