In this tutorial, we are going to cover how to add NSwag to Asp Net Core 3.0 web API using Visual Studio 2019 preview. NSwag is a Swagger/OpenAPI 2.0 and 3.0 API toolchain for .NET Core, .NET, Web API, TypeScript, Angular, and other platforms which is written in c#. The swagger specification uses JSON and JSON schema to describe a RESTful web API. The NSwag project provides tools to generate swagger specifications from existing Asp.Net web API controllers and client code from these swagger specifications.
So, in this tutorial, first-of-all, we will see how to create web api using asp net core 3.0, and then we will see how to add NSwag to Asp Net Core 3.0 web API, and then we will see how to generate code using NSwagStudio.
How to add NSwag to Asp Net Core 3.0 web API and Generate client code using Visual Studio 2019.
Let’s see how to implement NSwag to Asp Net Core 3.0 web API using Visual Studio 2019.
Step # 1: How to create Asp Net Core 3.0 Web API using Visual Studio 2019?
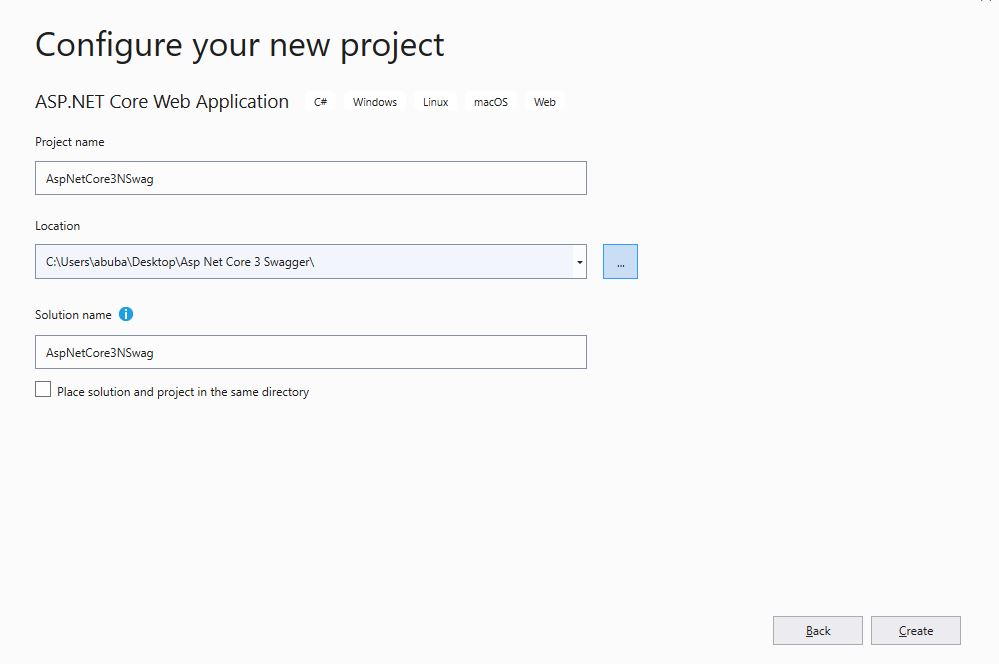
In this step, we will create a new Asp Net Core 3.0 web API project using Visual Studio 2019. So, open Visual Studio 2019 Preview, then click on Create a new project, and then click on ASP.NET Core Web Application and then click on Next button. Then enter the project name (E.g. AspNetCore3NSwag) and then click on Create button as you see in the below screenshot.
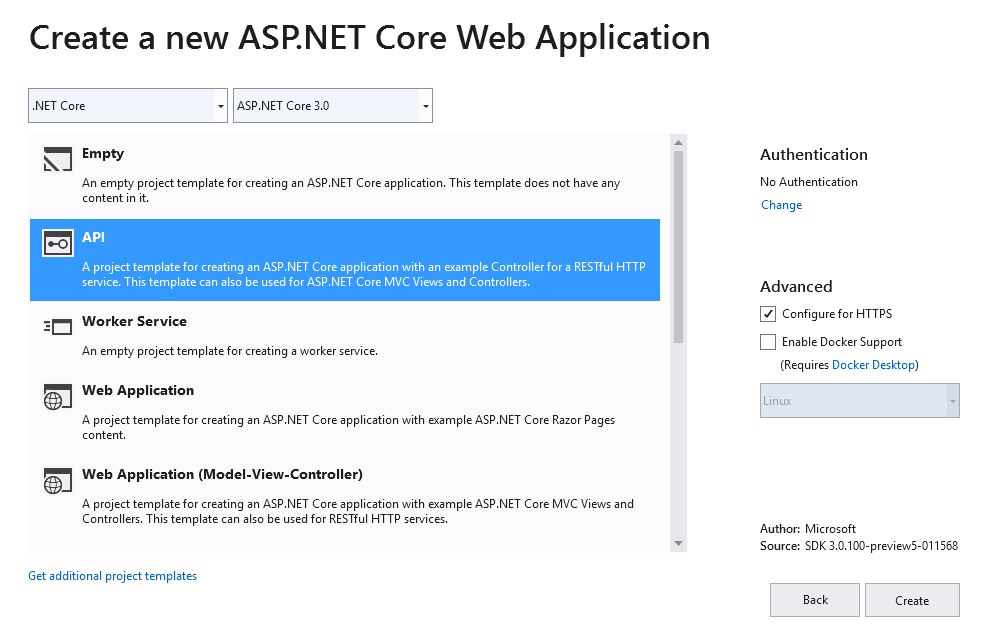
And now select API project template and then click on Create button as you see in the below screenshot.
After clicking on the Create button, then you will see a new Asp Net Core 3.0 web API project is created.
Step # 2: How to implement NSwag in Asp Net Core 3.0 Web API project.
Now, in this step, we will see how to implement NSwag in Asp Net Core 3.0 web API project. So, first-of-all, we will add the NSwag.AspNetCore package from NuGet to generate the SwaggerUI.
So, go to Tools, then Nuget Package Manager, and then click on Manage NuGet Packages for Solution… and then add the NSwag.AspNetCore package as you see in the below screenshot.

Or you can use this below command for Package Manager Console.
After installing the NSwag.AspNetCore package, now we need to add and configure swagger services and middleware in the Startup.cs file. So, go to project folder structure and then open Startup.cs file and then write the code as you see in the below file’s line # 31, 51 and 52.
Let’s understand the above code.
Line # 31: here in this line, we are adding the required swagger’s service.
Line # 51 and 52: here in these two lines, we are enabling the middleware for serving the generated swagger specification and the swagger UI.
Now, we are going to run this project to test swagger implementation. So, run this project by pressing f5 and then you will see the output as you see in the below screenshot.

Note: – Values API is a default API.
Now, run this url https://localhost:44357/swagger to test swagger. And then you will see the documentation of all the HTTP methods as you see in the below file.

So, we have implemented swagger successfully in Asp Net Core 3.0 web API project.
Note:- If you want to customize the Swagger UI, then follow this below post. How to add swagger to asp net core 3.0 web api
Step # 3: How to generate code using NSwag in Asp Net Core 3.0 web API?
Now, in this step, we will see how to generate code using NSwag in Asp Net Core 3.0 web API. So, we need to follow these below steps to generate code using NSwag Studio.
1- Install NSwag Studio:
So, first-of-all, we we need to download NSwagStudio and install it.
2- Launch NSwag Studio:
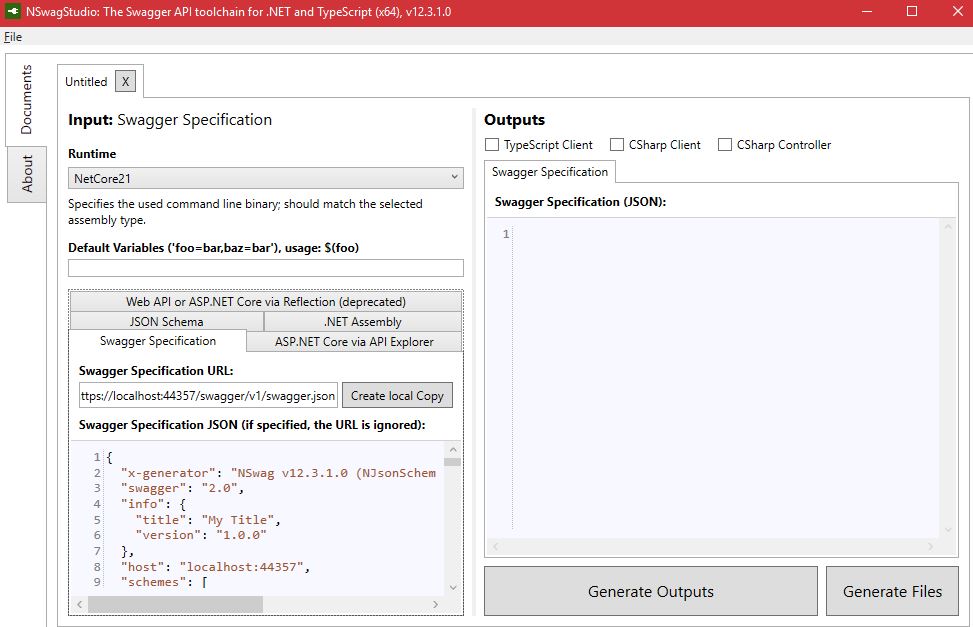
Now, launch the NSwag Studio and then enter the swagger api url (E.g. https://localhost:44357/swagger/v1/swagger.json) and then click on the Create local Copy button and it will generate some code as you see in the below screenshot.
3- Output Area or Generate Code:
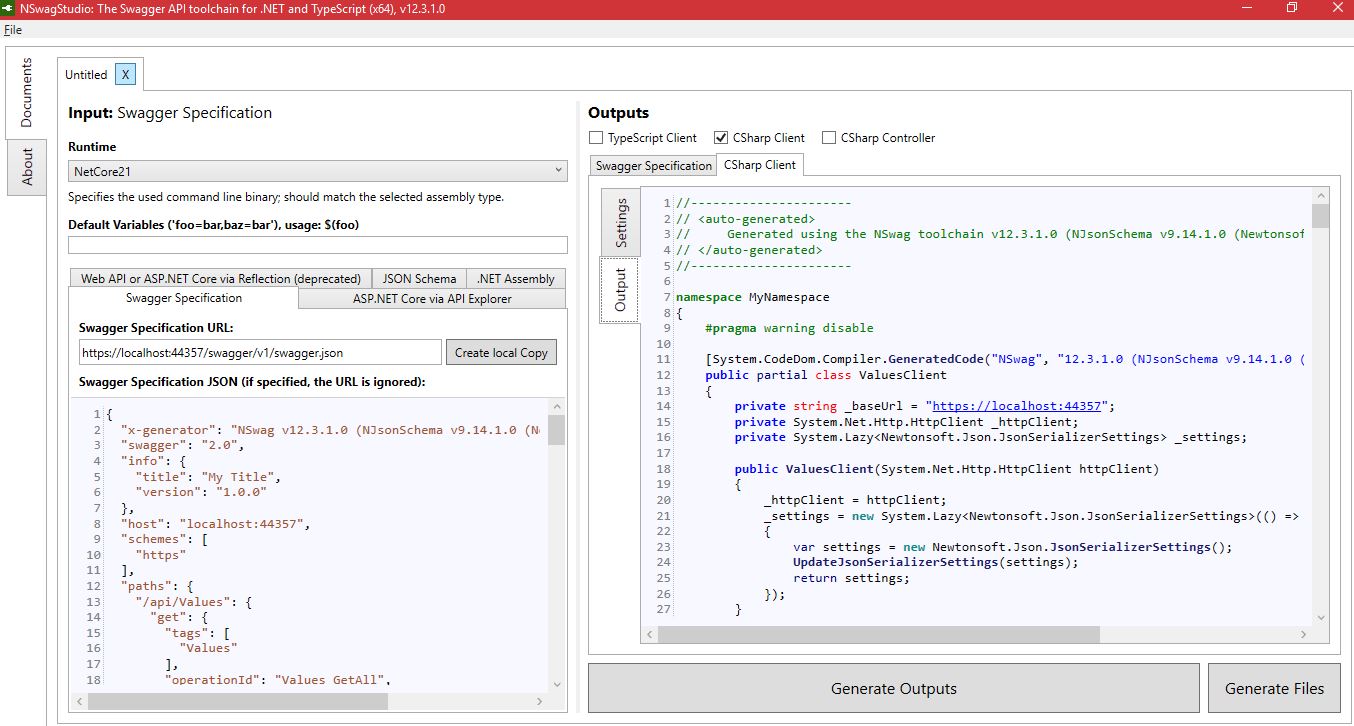
Now, go to output area in NSwag Studio, and then click on CSharp Client checkbox or you can check TypeScript Client or CSharp Controller base on your project. And then click on Generate Outputs. Then you will see the output as you see in the below screenshot.
Yes, we have generated code successfully using NSwag Studio. Now, copy this generated code and paste into the project where we want to consume the API as you see in the below file.
Now, we can consume the API as you see in the below file.
Thank you reading. Please like and share if you like it.

Leave a Reply