In this tutorial, we are going to cover web api token based authentication example using JWT in Asp Net Core 3.0 with Visual Studio 2019 preview. We will build it from scratch. So, First-of-all, we will create a new Asp Net Core 3.0 web API project, and then we will implement Microsoft Identity and then finally we will implement token based authentication using JWT in Asp Net Core 3.0 web API application.
Prerequisites
There are some prerequisites for this web api token based authentication example tutorial. So, before going to next you must need to install these below dependencies.
- Visual Studio 2019 Preview
- .NET Core 3.0
- Postman
- SQL server
Other Versions
How to implement token based authentication (JWT) in Asp Net Core 3.0 web api?
Let’s start to implement web api token based authentication example using asp net core 3.0 in step by step.
Step # 1: How to create asp net core 3.0 web api using visual studio 2019?
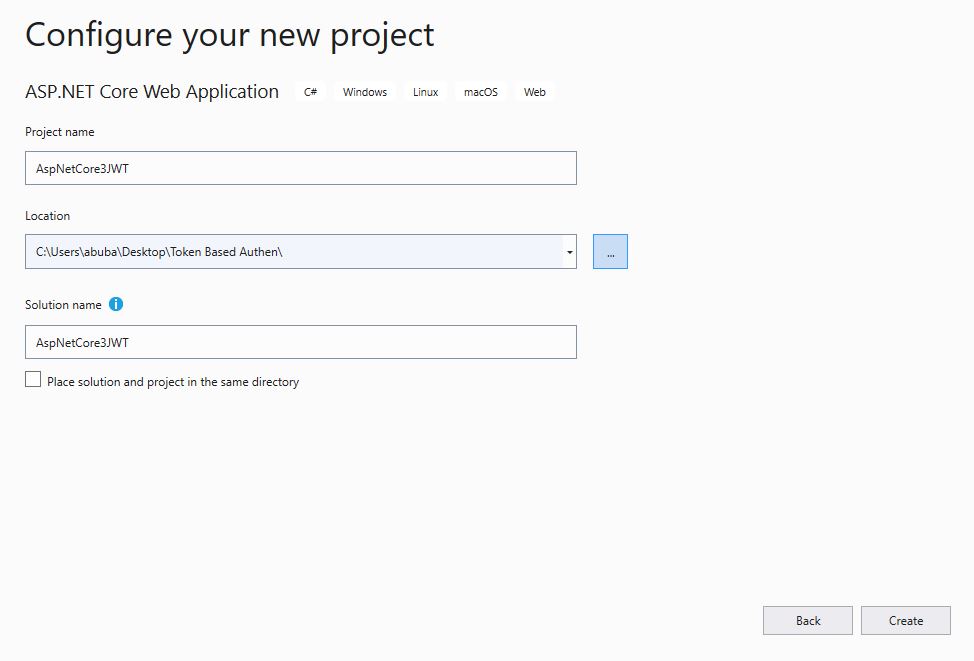
First-of-all, in this step we will create a new asp net core 3.0 web api using visual studio 2019. So, first-of-all, go to visual studio 2019 preview and then click on Create a new project and then select ASP.NET Core Web Application and click on Next button.
Then enter project name (E.g. AspNetCore3JWT ) in the Project Name field and then Create button
After clicking on the Create button, then you will see a new popup as you see in the below screenshot. So, select ASP.NET Core 3.0 framework from dropdown and then select API and then click on the Create button.

After clicking on the Create button, then you will see a new Asp Net Core 3.0 web api project is created.
Step # 2: How to setup Database and Implement Microsoft Identity in Asp Net Core 3.0 web API Project?
So, in this step, we will setup database in Asp Net Core 3.0 web api project. So, go to project folder structure and then open appsettings.json file and then add connection string as you see in the below file.
Now, go to project folder structure and then enter a new folder with the name of Data. In this folder, we will add all the database database related classes like ApplicationUser, ApplicationDbContext and etc.
So, right click on the newly created Data folder and then click on Add and then click on Class and then enter the name of class (E.g. ApplicationUser) and then write the code as you see in the below file.
Note: – don’t forget to import libraries.
Now, add another class inside the Data folder with the name of ApplicationDbContext and then write the code as you see in the below file.
Note: – don’t forget to import libraries.
Now, we will add a new seed class which will add a demo data for user account. So, right click on the Data folder and then click on Add and then click on Class and then enter the name of class (E.g. SeedDB) and then write the code as you see in the below file.
This above class will help us to create a new user account. As you see above the username will be Ali and the password will be Ali@123.
Now, we will add services to Startup.cs class. So, go to project folder structure and then open Startup.cs class and then write the code as you see in the below file’s line # 38 to 41 and line # 56..
Let’s understand the above code.
Line # 38: In this line, we are adding the service for sql server db.
Line # 39 to 41: here in this line, we are adding service for Microsoft Identity.
Line # 56: here in this line, we are initializing the SeedDB class to create a new user.
Now, the database and identity implementation part is completed.
Step # 3: How to implement token based authentication using jwt in asp net core 3.0 web api?
Now, in this step, we will see how to implement token based authentication using JWT in Asp Net Core 3.0 web API. So to do this, first-of-all, we will add a new model class and then add a new controller which will evaluate the token based authentication.
So, go to project folder structure and then add a new folder with the name of Models. Now, right click on newly created Models folder and then Add and then click on Class and then enter the name of class (E.g. LoginModel) and then click on Add button. Now, write the properties as you see in the below screenshot.
Now, go to project folder structure and then right click on the Controllers folder and then Add and then click on Controller… and then select MVC Controller – Empty from the middle pane and then click on Add button and then enter the name of controller (E.g. AuthenticateController) and then click Add button. So, it will create a new controller class with the name of AuthenticateController.cs.
Now, write the code as you see in the below file.
Let’s understand the above code..
Line # 17: here in this line, we are declaring the route path for API.
Line # 20: here in this line, we are injecting the user manager.
Line # 31: here in this line, we are getting the specific user.
Line # 32: here in this line, we are checking the user value and password. If the condition is true, then we will generate the token otherwise it will return Unauthorized response.
Line # 35 to 39: here in these lines, we are creating claims.
Line # 41: here in this line, we are creating signing key.
Note: – if you want to know how to add signing key (“SecureKey“) in Asp.Net Core user secrets, then click here.
Line # 43 to 49: here in this block of code, we are generating token using JWT.
Line # 51 to 55: here in this block, we are returning the ok status with token and expiration time after generating token successfully.
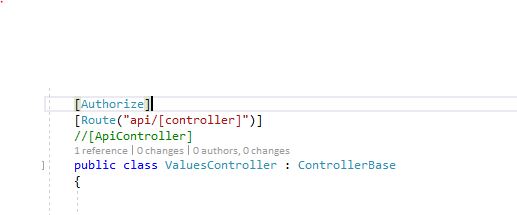
Now, go to controllers folder and then open ValuesController and then just put the Authorize attribute to test the token as you see in the below code.
Now, we need to add Authentication service in the Startup.cs class as you see in the below file’s line # 44 to 62 and line # 81.
Now, token implementation part is completed.
Run Project
Now finally, we will run our project and then will see the output using POSTMAN. So, run your project by pressing f5.
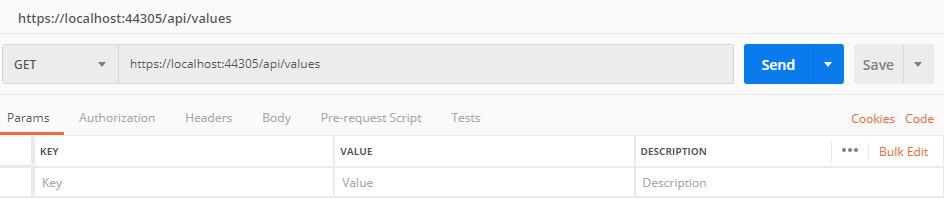
Now, open postman and then enter the API path (E.g. https://localhost:44305/api/values) using get request and then press Send button as you see in the below screenshot.
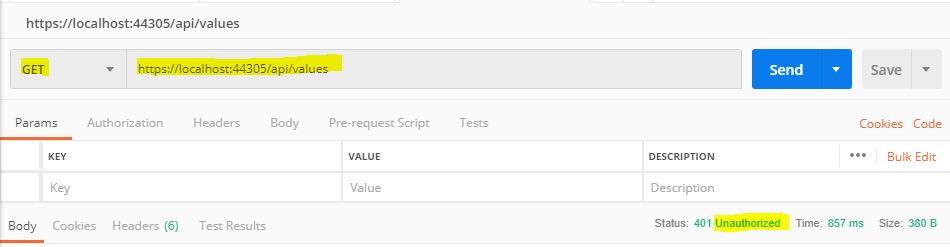
After clicking on the Send button, then you will see the output with unauthorized status as you see in the below screenshot.
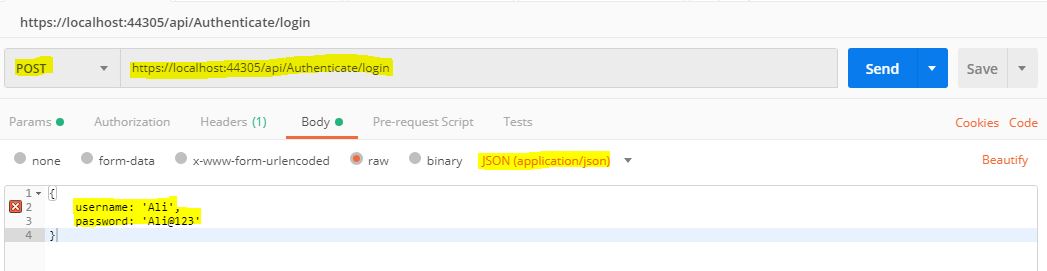
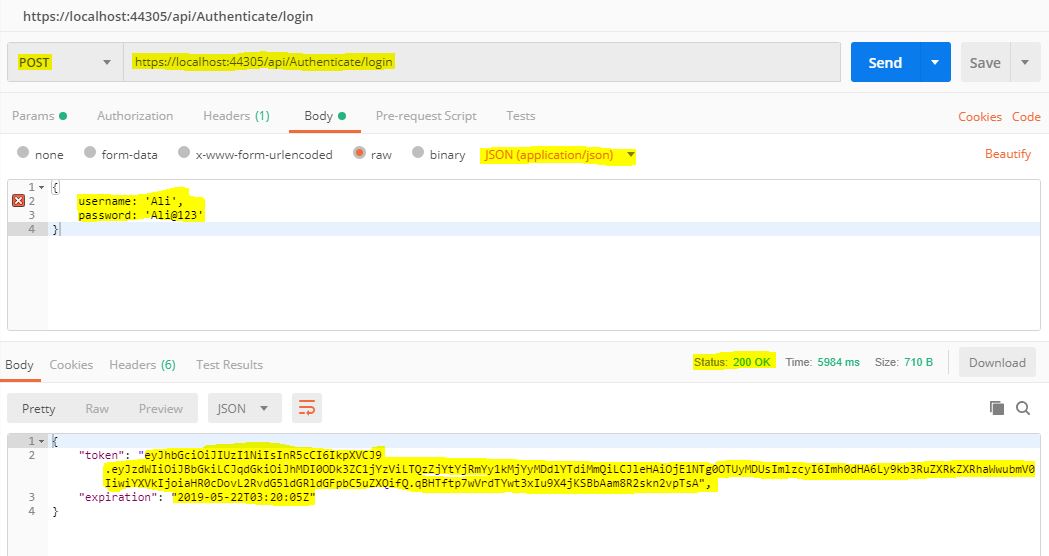
Now, we will generate token using login method by passing username and password as you see in the below screenshot.
Now, if this above login request generated successfully, then you will see the output as you see in the below screenshot.
Now, copy the token value and then paste into the token text area and then request the Values controller with token as you see in the below screenshot.

Now, finally you will see the output with 200 status as you see in the below screenshot.

Congratulation, we have successfully created a web api token based authentication example using JWT and Asp Net Core 3.0 with Visual Studio 2019 preview.
If you want to learn about Asp Net Core 3.0 Web API Versioning best practices then Click here
Hi Nice Article please also mention to install Packages Microsoft.AspNetCore.Identity.EntityFrameworkCore
Microsoft.EntityFrameworkCore
That are not Installed by default in version 3.0
Thank you Rashed for your valuable suggestion.
Actually, i have already mentioned it in the form of Note just below the “ApplicationDbContext” class code.
Thank you!
Hi there! What about registering user? I noticed that bundled vs 2019 use Razor pages to provide the user a registration flow… strange, if you ask me.
Thank you for putting this tutorial together. However… when I use Postman to do the “login” I get the following:
System.ArgumentOutOfRangeException: IDX10603: Decryption failed. Keys tried: ‘[PII is hidden. For more details, see https://aka.ms/IdentityModel/PII.%5D‘.
Exceptions caught:
‘[PII is hidden. For more details, see https://aka.ms/IdentityModel/PII.%5D‘.
token: ‘[PII is hidden. For more details, see https://aka.ms/IdentityModel/PII.%5D‘ (Parameter ‘KeySize’)
at Microsoft.IdentityModel.Tokens.SymmetricSignatureProvider..ctor(SecurityKey key, String algorithm, Boolean willCreateSignatures)
at Microsoft.IdentityModel.Tokens.CryptoProviderFactory.CreateSignatureProvider(SecurityKey key, String algorithm, Boolean willCreateSignatures)
at Microsoft.IdentityModel.Tokens.CryptoProviderFactory.CreateForSigning(SecurityKey key, String algorithm)
at Microsoft.IdentityModel.JsonWebTokens.JwtTokenUtilities.CreateEncodedSignature(String input, SigningCredentials signingCredentials)
at System.IdentityModel.Tokens.Jwt.JwtSecurityTokenHandler.WriteToken(SecurityToken token)
at IdentityWebApiCore3.Controllers.AuthenticateController.Login(LoginModel model) in C:\Jeffs\ASP.Net_stuff\Core_3.0\IdentityWebAPI\IdentityWebApiCore3\IdentityWebApiCore3\Controllers\AuthenticateController.cs:line 51
at Microsoft.AspNetCore.Mvc.Infrastructure.ActionMethodExecutor.TaskOfIActionResultExecutor.Execute(IActionResultTypeMapper mapper, ObjectMethodExecutor executor, Object controller, Object[] arguments)
at Microsoft.AspNetCore.Mvc.Infrastructure.ControllerActionInvoker.g__Awaited|12_0(ControllerActionInvoker invoker, ValueTask`1 actionResultValueTask)
at Microsoft.AspNetCore.Mvc.Infrastructure.ControllerActionInvoker.g__Awaited|10_0(ControllerActionInvoker invoker, Task lastTask, State next, Scope scope, Object state, Boolean isCompleted)
at Microsoft.AspNetCore.Mvc.Infrastructure.ControllerActionInvoker.Rethrow(ActionExecutedContextSealed context)
at Microsoft.AspNetCore.Mvc.Infrastructure.ControllerActionInvoker.Next(State& next, Scope& scope, Object& state, Boolean& isCompleted)
at Microsoft.AspNetCore.Mvc.Infrastructure.ControllerActionInvoker.g__Awaited|13_0(ControllerActionInvoker invoker, Task lastTask, State next, Scope scope, Object state, Boolean isCompleted)
at Microsoft.AspNetCore.Mvc.Infrastructure.ResourceInvoker.g__Awaited|24_0(ResourceInvoker invoker, Task lastTask, State next, Scope scope, Object state, Boolean isCompleted)
at Microsoft.AspNetCore.Mvc.Infrastructure.ResourceInvoker.Rethrow(ResourceExecutedContextSealed context)
at Microsoft.AspNetCore.Mvc.Infrastructure.ResourceInvoker.Next(State& next, Scope& scope, Object& state, Boolean& isCompleted)
at Microsoft.AspNetCore.Mvc.Infrastructure.ResourceInvoker.g__Awaited|19_0(ResourceInvoker invoker, Task lastTask, State next, Scope scope, Object state, Boolean isCompleted)
at Microsoft.AspNetCore.Mvc.Infrastructure.ResourceInvoker.g__Logged|17_1(ResourceInvoker invoker)
at Microsoft.AspNetCore.Routing.EndpointMiddleware.g__AwaitRequestTask|6_0(Endpoint endpoint, Task requestTask, ILogger logger)
at Microsoft.AspNetCore.Authorization.AuthorizationMiddleware.Invoke(HttpContext context)
at Microsoft.AspNetCore.Authentication.AuthenticationMiddleware.Invoke(HttpContext context)
at Microsoft.AspNetCore.Diagnostics.DeveloperExceptionPageMiddleware.Invoke(HttpContext context)
HEADERS
=======
Accept: */*
Accept-Encoding: gzip, deflate
Cache-Control: no-cache
Connection: keep-alive
Content-Length: 53
Content-Type: application/json
Host: localhost:44389
User-Agent: PostmanRuntime/7.3.0
Postman-Token: 5e9ea4f2-aa4e-440c-8474-8119ca58b90f
I figured it out…
I had to change the “SecureKey” to an actual long key value (i.e.: YVBy0OLlMQG6VVVp1OH7Xzyr7gHuw1qvUC5dcGt3SBM=) and switch “issuer” and “audience” over to use my localhost URL (i.e.: localhost:44389).
All 3 of those needed to be changed in both the AuthenticateController.cs file (lines 41, 44, & 45) and the Startup.cs file (lines 58, 59, & 60).
I hope this helps others with the same issue.
had same issue as Jeff. Thanks Jeff for posting. And thanks to the author for a good article.
In addition to what you said, I had to add the following in order to make it work.
services.AddAuthorization(options =>
{
options.DefaultPolicy = new AuthorizationPolicyBuilder(JwtBearerDefaults.AuthenticationScheme)
.RequireAuthenticatedUser()
.Build();
});
I have got same issue.My solution is change “SecureKey” to random string 16 digits.
Thanks.
The issue is only the length of the securekey… needs to be at least 16 characters long. The issuer and audience can be any string you choose.
After searching for two days this is the tutorial I was looking for. Thank you.
Using
{
“username”: “Ali”,
“password”: “Ali@123”
}
instead of
{
username: ‘Ali’,
password: ‘Ali@123’
}
—
Just Json format. (i have stucked here a few minutes)
Thanks anyways.
Does Identity implements Oath 2.0 i have a task to implement that kind of authentication inside my API .net core 3.1 anyone knows ?
Thanks for this beautiful tutorial but the most important part missing; how can we refresh token?
Hello,
Thank you for this article, I can get token very well but while I add [Authorize] to my controler it returns 404 with or without token?! can you guide me where is the problem?
[Route(“api/[controller]”)]
[ApiController]
[Authorize]
public class CountryController : ControllerBase{}
services.AddAuthentication(options =>
{
options.DefaultAuthenticateScheme = JwtBearerDefaults.AuthenticationScheme;
options.DefaultChallengeScheme = JwtBearerDefaults.AuthenticationScheme;
// options.DefaultScheme = JwtBearerDefaults.AuthenticationScheme;
}).AddJwtBearer(options =>
{
options.Authority = “http://XXXX.de”;
options.Audience = “http://XXXX.de”;
});
Hi,
Thanks for Tutorial. It’s very clean and easy to understand..
i have only one question.
Can i use one account database with this api jwt token base authentication and core 3 razor page projects.
Thank you for a great article on JWT authentication in ASP.NET Core. I want to let you know that I had to change the ‘IssuerSigningKey ‘ to:
IssuerSigningKey = new SymmetricSecurityKey(Encoding.UTF8.GetBytes(“Bond007”))
My project then ran perfectly.
Hope it helps others to.
Thank you!
did not understand where to insert it (Now, go to controllers folder and then open ValuesController and then just put the Authorize attribute to test the token as you see in the below code.)?
How i can complete project as add more seeds for users and set role with authorization angular for pages and action