In this tutorial, we are going to learn how to deploy React and Asp Net Core 3 application to IIS ( Internet Information Service ) manager in step by step. In previous tutorial, we have discussed how to create ReactJs and Asp.Net Core app using Visual Studio 2017. So, first-of-all, we will install .Net Core runtime and then we will see how to enable IIS on windows 10 and then finally we will see how to deploy React and Asp Net Core 3 app to IIS.
Previous Tutorials
- how to create ReactJs and Asp.Net Core app using Visual Studio 2017
- How to Create CRUD operations using Reactjs and Asp Net Core 2.0?
Deploy React and Asp.Net Core 3.0 app to IIS (Internet Information Service)
Let’s see how to deploy React and Asp.Net Core 3.0 app to IIS in step by step.
Step # 1: Install .NET Core 3 runtime
First-of-all, we need to install .NET Core runtime in the system where we want to deploy React and Asp.Net Core 3 application. So, click here to download .NET Core 3 runtime and then install it in your system.
Note: – If you have already have enabled IIS ( Internet Information Service ) on your system, then you can skip the Step # 2.
Step # 2: Enable IIS ( Internet Information Service ) on windows 10
So, in this step, we will enable IIS ( Internet Information Service ) on the machine where we want to deploy our React and Asp.Net Core 3 application.
So, go to control panel and then click on the “Programs” and then “Programs and Features” and then click on the “Turn Windows features on or off” from the sidebar. It will open a new popup with the name of “Windows Features”. So, now click on “Internet Information Services” option and then click on “Web Management Tools” and then click on the “IIS Management Console” checkbox and then click on the OK button.

Step # 3: Publish React and Asp.Net Core 3 app using Visual Studio 2019
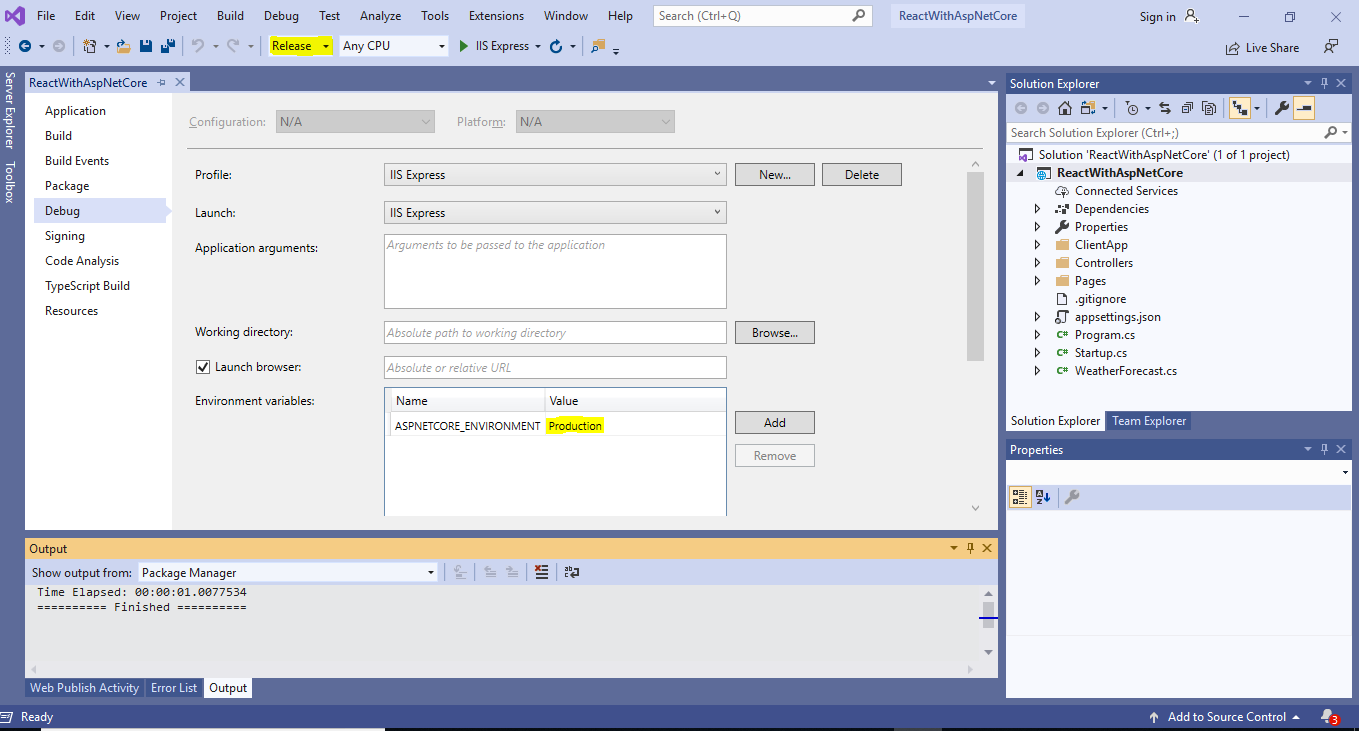
In this step, we will publish React and Asp.Net Core 3 app using visual studio 2019. So, go to project folder directory in visual studio 2019 and then click on the project name and then click on the properties and change the environment from Development to Production and then set the configuration from Build to Release mode as you do see in the below screenshot.
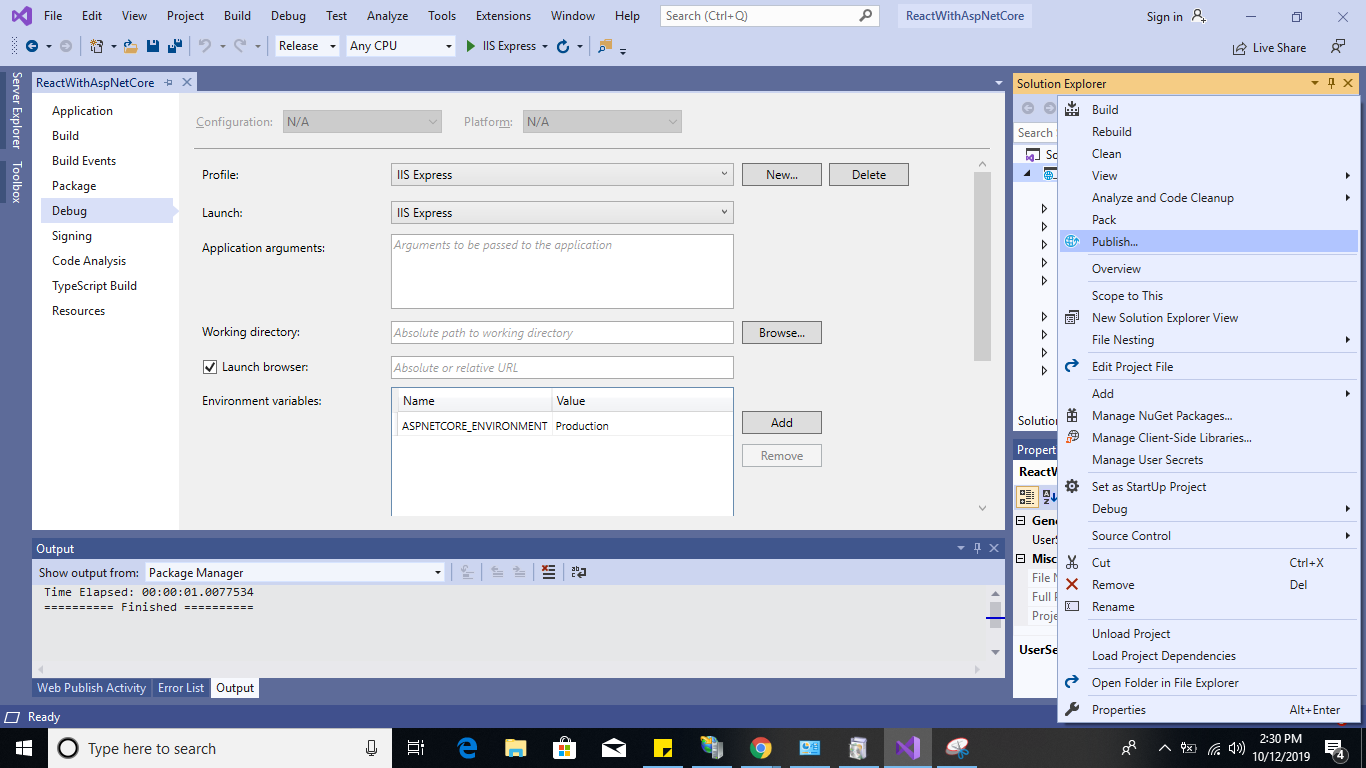
Now, right click on the project name and then select publish as you do see in the below screenshot.
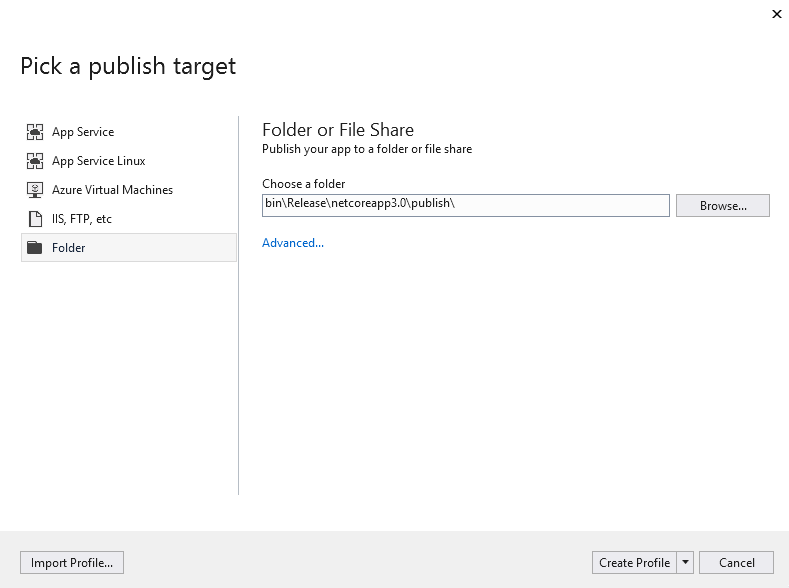
Then it will open a new window with the name of Publish. Now, click on “New Profile” link and then it will open a new popup with the name of “Pick a publish target” and then click on the Folder from the sidebar as you do see in the below screenshot.
Now, click on the “Browse…” button to choose the path for your publish folder. Then it will open a new popup window with the name of “Target Location”. So, now create a new folder with the name that you want as you do see in the below screenshot.
Now, click on the “Open” button and then it will close the “Target Location Popup” popup window. Now, in the “Pick and Publish Target” popup window, click on the “Create Profile” button. Then you will see the “Publish” window again. Now, click on the “Publish” button as you do see in the below screenshot.
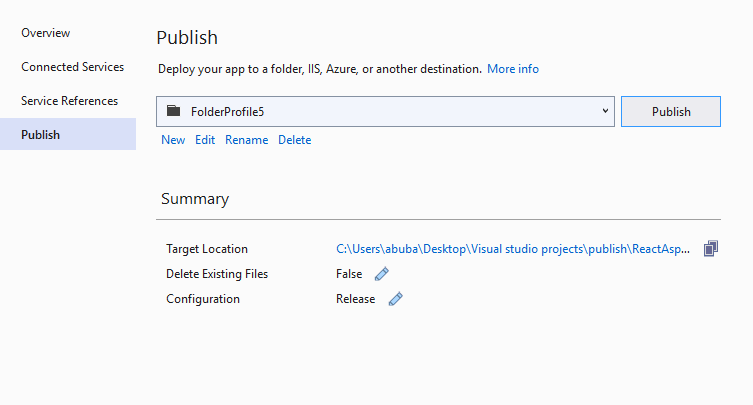
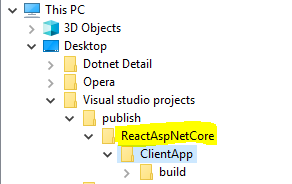
Then it will take some time to publish your project within your directory. Then it will add the project files in your folder directory as you do see in the below screenshot.

Now, go to terminal and then open the published folder directory and then run this below command to check if it is working fine in production mode or not. Our application is working fine in production mode.
=> dotnet ReactWithAspNetCore.dll

Step # 4: deploy React and Asp Net Core 3 app to IIS
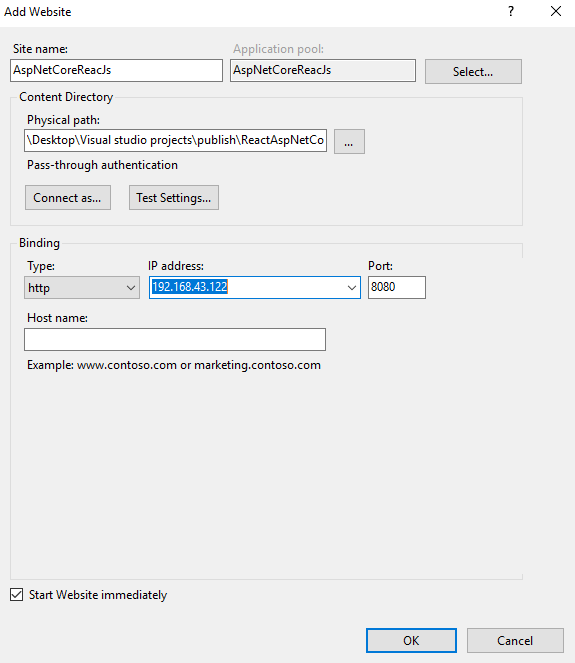
Now, in this step, we will deploy React and Asp.Net Core 3 application to IIS. So, go to IIS (Internet Information Service) and then go to sidebar and then right click on the “Sites” folder and then click on the “Add Website”. And then it will open a new popup window with the name of “Add Website”. Now, enter the name of your site, and then choose physical path where you have published your project and then assign IP address and then set the port number and then click on the “OK” button as you do see in the below screenshot.
Now, go to browser and then enter the URL (E.g. https://192.168.43.122:8080) and then you will see your site is up and running in the browser.
Thank you for reading. Please keep visiting and sharing within your community
Leave a Reply