In this tutorial, we are going to cover how to deploy React and Asp.Net Core 3 application to Azure using Visual Studio 2019. So, first-of-all, will see how to create Azure App service using Visual Studio 2019, and then we will deploy our application to Azure App Service. In previous tutorial, we have discussed how to deploy React and Asp.Net Core 3.0 application to IIS (Internet Information Service) using Visual Studio 2019.
Previous Tutorials
- How to create React and Asp.Net Core App using Visual Studio 2017
- How to Create CRUD operations using React and Asp.Net Core
- How to add authentication to React app using Asp.Net Core 3 in Visual Studio 2019
- How to deploy React and Asp.Net Core 3.0 app to IIS (Internet Information Service)
Deploy React and Asp Net Core 3.0 app to Azure using Visual Studio 2019
Let’s see how to deploy React and Asp.Net Core 3.0 app to Azure using Visual Studio 2019 in step by step.
Note: – we will not create a new project in this tutorial. If you want to know how to create a new project using React and Asp.Net Core app using visual studio then click here.
Step # 1 : Publish React and Asp.Net Core 3.0 App using Visual Studio 2019
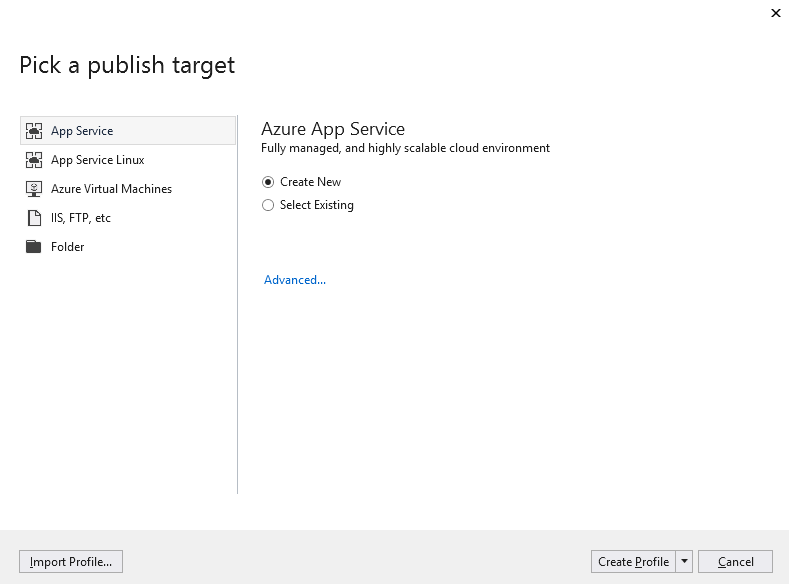
In this step, we will publish our application using Visual Studio 2019. So, go to project folder structure and then right click on the project name and then select Publish and then you will see a new popup with the name “Pick a publish target ”.
Now, select “App Service” from sidebar and then choose the “Create New” radio button and then select Create Profile as you do see in the below screenshot.
Then you will see a new dialog box with the name of “Create App Service” If you already have an Azure account then click on the “Sign In” link. If you don’t have, then click on the “Create your free Azure account” link and then create a new free Azure account as you do see below in the screenshot.

After Sign in to Azure account, then you will see a popup window with the name of “App Service Create New ”.
Step # 2: Create App Service
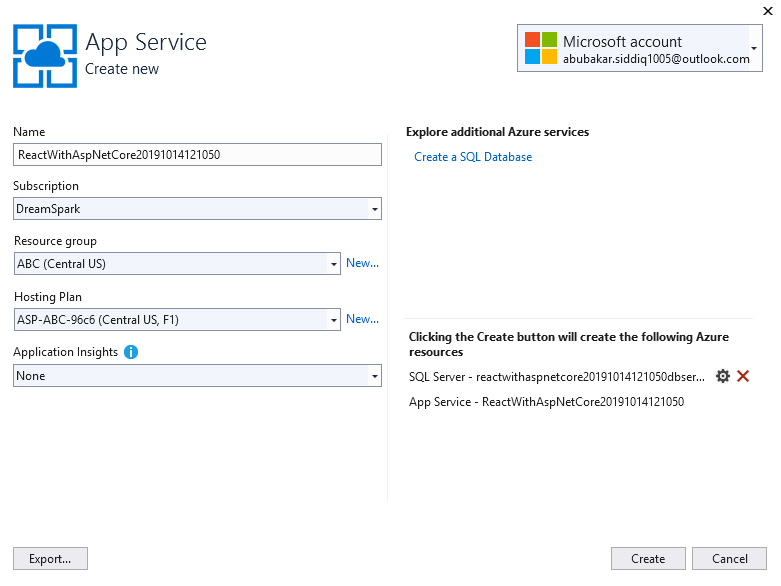
Now, in this tutorial, we will see how to create an App service using Visual Studio 2019. So, after creating a free Azure account, you will see the below screenshot. Now, enter the app name and then select the “Subscription” from the “subscription dropdown” and then select Resource group and then select the Hosting plan.

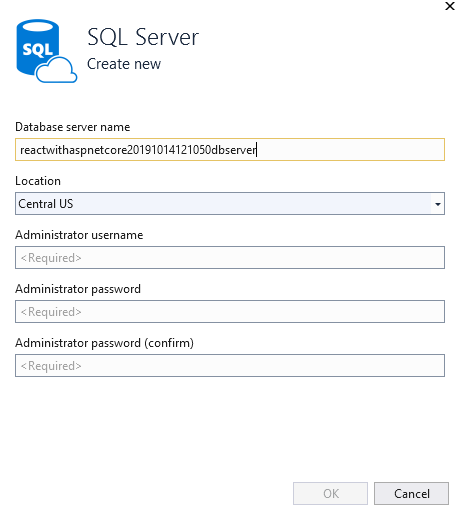
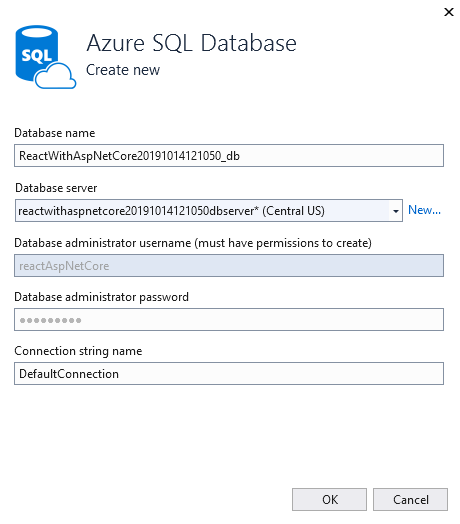
Now, if you need to create a database then click on the “Create SQL Database” link and then you will see a new popup with the name of “Azure SQL Database”. Now, click on the “New…” link and then you will see a new popup “SQL Server”. Now, enter the “Database Server Name” and then enter “Location” and then “Administrator Username” and then “Administrator Password” and then “Administrator Password (confirm)” and then click on the “Ok” button.
After clicking the “Ok” button then you will see again the “Azure SQL Database”. Now, click on the “OK” button.
Then you will see “Create App Service” again. Now, just click on the “Create” button. This step will take some time and it will create the app and SQL server on Azure.
Then you will see “Publish” page again. Now, click on the “Publish” button.

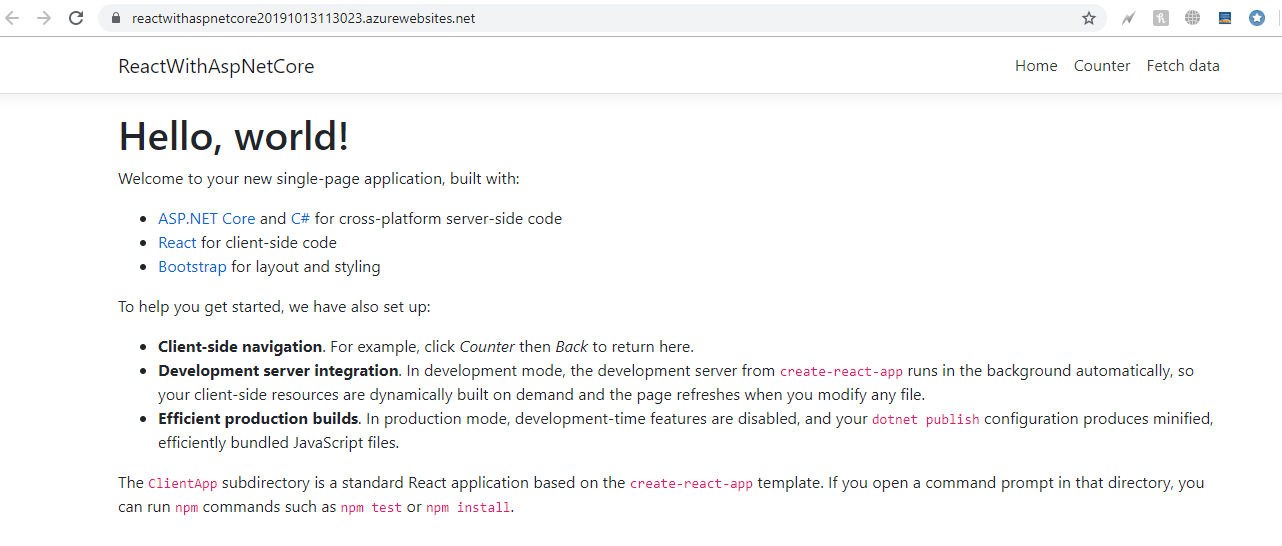
And after some time you will see your site will be deployed to Azure and will be live as you do see in the below screenshot.
Thank you for reading. Please keep reading and sharing within this community!

Leave a Reply