In this tutorial, we are going to cover a simple example of how to implement Role Based Authorization / access control in Asp.Net Core 3.0 using visual studio 2019. In one of the previous tutorials, we have discussed Asp.Net Core 3.0 web API token based authentication example using JWT. So, now first-of-all, we will create Asp.Net Core 3.0 application, and then we will add identity to our application and then we will register users and then we will see how to create roles and then finally we will see how to authorize pages.
Previous Tutorials
- Asp.Net Core 3.0 web API token based authentication example using JWT
- Asp.Net Core 3.0 Web API Versioning best practices
- How to implement automapper in Asp.Net Core 3.0 application
Role Based Authorization in Asp.Net Core 3.0 using Visual Studio 2019
Let’s see how to implement role based authorization in Asp.Net Core 3.0 application in step by step.
Step # 1: How to Create Asp.Net Core 3.0 app using visual studio 2019.
First-of-all, in this step we will create a new Asp.Net Core 3.0 application using visual studio 2019. So, go to visual studio 2019 and then click on the “Create a new project” button and then select “ASP.NET Core Web Application” template and then click on the “Next” button. Now, enter the name in the “Project name” field and then choose “Location” and then click on the “Create” button.
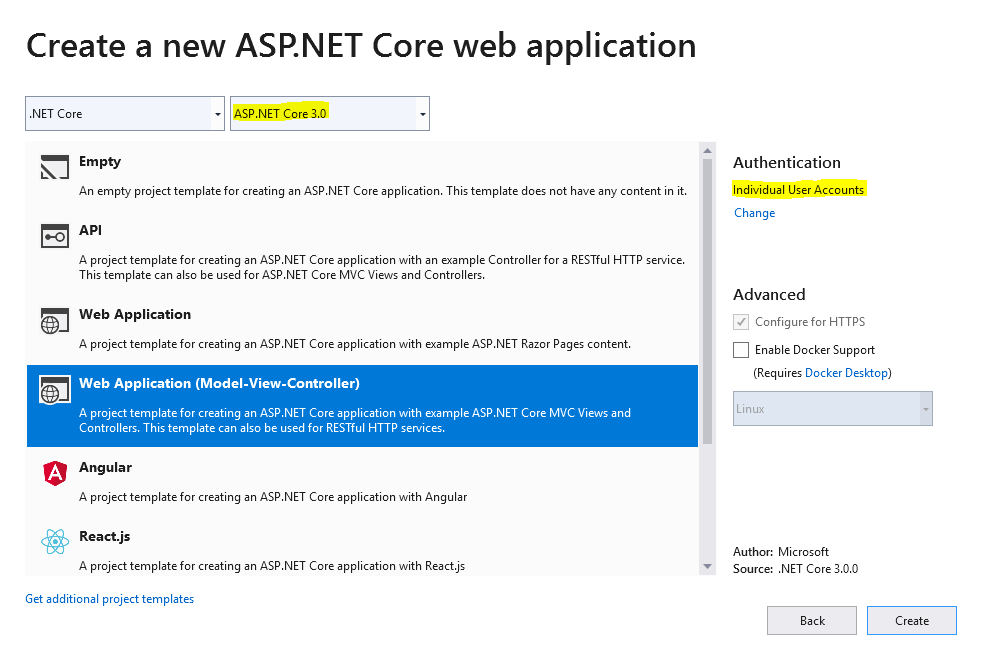
Now, select “ASP.NET Core 3.0” from the drop-down and then select “Web Application (Model-View-Controller)” template and then click on the “Change” link from the right sidebar just under the Authentication label and then click on the “Individual User Accounts” radio button from the left sidebar and then choose “Store user accounts in-app” from the drop-down and then click on the “OK” button and then click on the “Create” button as you do see below in the screenshot. It will create a new project with Model-View-Controller template with some default files.
Step # 2: How to add identity in Asp.Net Core 3.0 application?
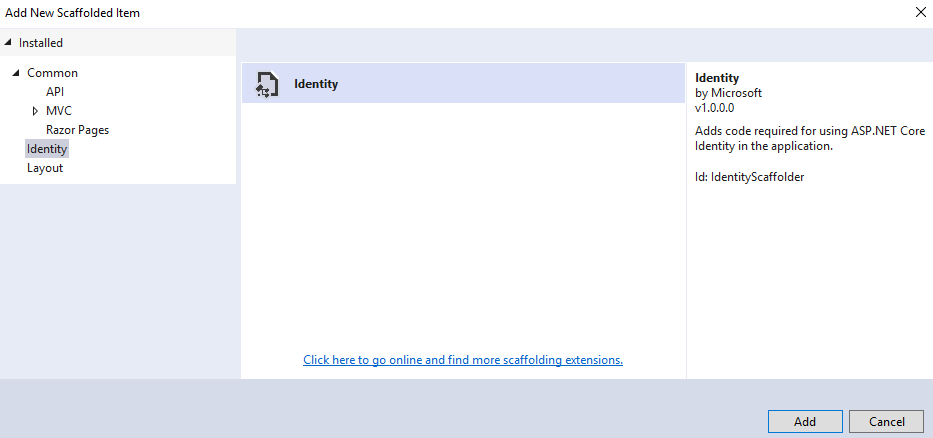
In this step, we will see how to add Identity to Asp.Net Core 3.0 (Model-View-Controller) application using scaffolding. So, go to project folder structure and then right click on the project name and then select Add and then choose New Scaffolded Item… and then choose Identity from the left sidebar and then choose Identity from the middle pane and then click on the Add button as you do see below in the screenshot.
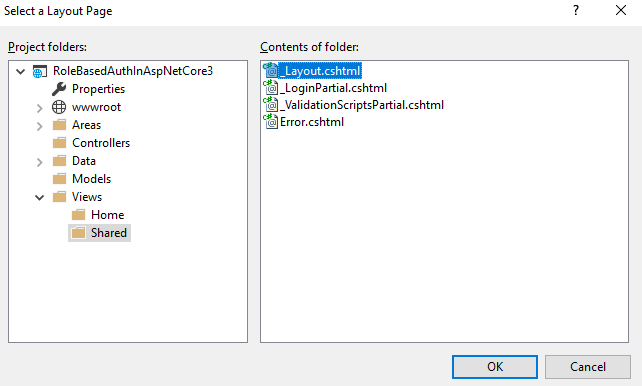
Then it will take some time and then it will show an Add Identity popup. Now, select layout page or you can specify a new one. So, to do it just click on the button from the right side of the layout field and it will open a new popup window with the name of Select a Layout Page as you do see below in the screenshot. Now, select _Layout.cshtml and then click on the Ok button and it will take you to the Add Identity popup again.
After clicking on the OK button, you will see the path of _Layout.cshtml page in the input field. Now, check the Override all files checkbox and then select the ApplicationDbContext class from the drop-down or you can create a new one by clicking on the right button with plus sign and then click on the Add button as you do see below in the screenshot.

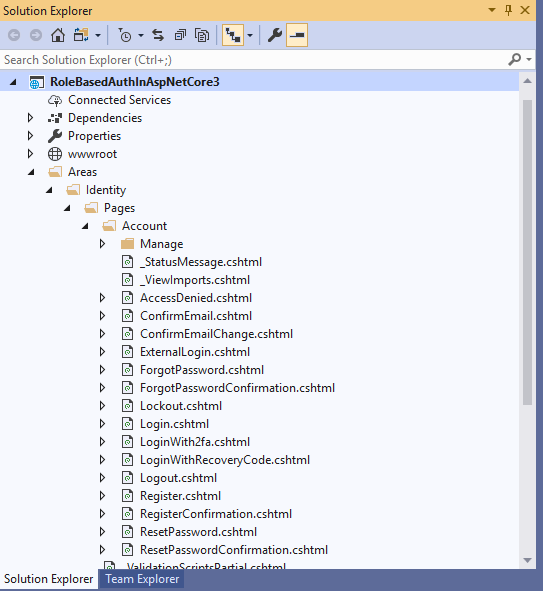
It will take some time and then add the ASP.NET Core Identity to the project as you do see below in the screenshot.
Step # 3: Create Database
In this step, we will see how to create a database using migration. If you want to change database name then go to appsettings.json file and then add change the connection string as you do see below in the below file.
Now, go to package manager console and run these below two commands.
=> add-migration InitialCommit
=> update-database
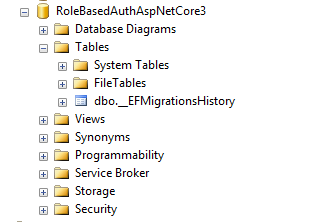
Now, it will create a database as you do see below in the screenshot.
Now, run the project by pressing f5 and then register some user as you want. I have registered two users with the two emails one for admin and the other one is for manager that we will use later in this tutorial.

Step # 5: How to create roles in Asp.Net Core 3.0 Application?
Now, in this step, we will see how to create roles in Asp.Net Core 3.0 application. So, go to project folder structure and then go to Startup.cs class and then write the code as you do see below in the file.
Let’s understand the above code.
Line # 34: Here in this line, we are adding IdentityRole to our project.
Line # 41: Here in this line, we are adding parameter services parameter.
Line # 69: Here in this line, we are calling the CreateRoles method with parameter to create roles.
Line # 72 to 90: this block of code will create the roles and then assign the role to the user what we have created above.
So, in this tutorial, I have created two roles with the name of “Admin” and the “Manager” One is “Admin” and the second one is “Manager”
Step # 6: How to implement role based authorization?
Now, in this step, we will create two Controllers. One is for Admin and the second one is for Manager. So, go to project folder structure and then right click on the Controllers folder and then Add and then select Controller… and then choose MVC Controller – Empty from the middle pane and then click on the Add button and then enter the name (E.g. AdminController) and then click on the Add button. It will create a new AdminController class as you do see below in the file.
Now, right click on the Index method and then click on the Add View… and then it will show a new popup with the name of Add MVC View as you do see below in the screenshot.

Now, write some code for the view as you do see below in the file.
Now, we will add authorize tag to the AdminController as you do see below in the file.
In the above code’s line # 12, we have added the Authorize tag with the Admin role. So, it means, this controller will be acceccible only to the user who have assigned Admin role.
Now, add a new controller with the name of ManagerController and then add the authorize tag as you do see below in the file.
Now, right click on the Index method and then add a view.
Step # 7 – Add menu to access Admin and Manager controllers
Now, in this step we will add Admin and Manager to the menu. So, go to project folder structure and then go to Views folder and then go to Shared folder and then go to _Leyout.cshtml. So, now write the code as you do see below in the file’s line # 28 to 33.
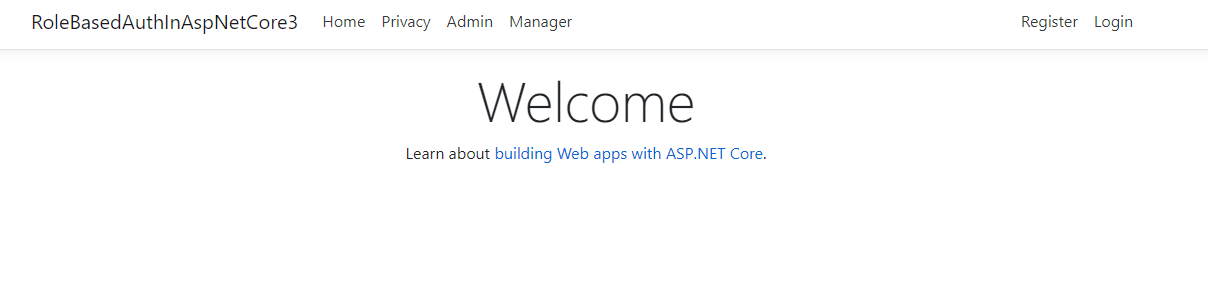
Now, run the project and then you will see the output as you do see below in the screenshot.
Now, click on the Admin link from the menu. It will take you to the Login page. So, after successfully entering the credentials, you will see the admin page as you do see below in the screenshot.

Now, click on the Manager link from the menu, and then you will see the output as you do see below in the screenshot. It is because you don’t have access to the manager page.

Now, logout form the admin user and login with the manager user. And then try to access both the pages (Admin and Manager).
Thank you for reading. Please keep visiting and sharing this blog within your community.
Line 89 in the CreateRoles() method has us create a new IdentityUser(). Why do we do this?
Getting this error:
‘One or more errors occurred. (No service for type ‘Microsoft.AspNetCore.Identity.RoleManager`1[Microsoft.AspNetCore.Identity.IdentityRole]’ has been registered.)’
Excellent tutorial. I have been looking for a good tutorial on authentication for a long time. I finally found it. You are exceptional. You’re a monster. Thanks so much 🙂
Thank you very much it’s very helpful
but i can’t use two roles
one only for admin is working
but the manager page not accessed
what is the problem ?
Can you show me your code? so i can tell you the problem.
Hello mebakar1005, Kindly can you make a tutorial on “How to add Role based Authorization in Asp.net Core3.0 and React.js project”.
That’s happened because you have not created the Manager Role yet. It’s not in the tutorial.
The only thing this tutorial is lacking is adding roles to other users (not just Admin) outside Startup.cs. I find it to be a problem for me.
Aside from that, the tutorial is very simple and clearly explained. This is the best thing I found on this topic. Thank you.
Hi
Can you share code because i not use CreateRoles(services).Wait(); it show services error
You’re missing the parm add in line 41 detailed in the tutorial:
Line # 41: Here in this line, we are adding parameter services parameter.
Hi,
I have the same problem. I guess there is some explanatory code missing for the manager user in step #5
Hi
Can you share code because i not use CreateRoles(services).Wait(); it show services error
You’re missing the parm add in line 41 detailed in the tutorial:
Line # 41: Here in this line, we are adding parameter services parameter.
Excellent tutorial !!!! Thanks a lot !!!